Mini Masterpieces Art Display

Hey Hey!

So, we are homeschooling, if you couldn’t tell by the 8 million post on the subject and we needed something. It was critical. We couldn’t make it without it. Well, we could but what’s life without some fun drama? ?
We needed something to display artwork because… I’m not sentimental. I wouldn’t keep it. I may take a picture of it and trash it. Horrible. I know. Feed me to the wolves. I’m not worthy. 
Anywho, I came across this via Pintrest during my middle-of-the-night pregnancy insomnia searches and went to Home Depot 4 hours after I found it. Talk about being inspired, right?
I grabbed a yardstick that 3 people had to help me find for a whopping $.98. 


Now, the paint…I couldn’t decide on a color until I realized I had to go dark to mask the neon orange writing on the yard stick. So, I applied 3 coats of grey acrylic paint. 


I already had clothes pins that I painted white last December but I went over them with two coats of white acrylic paint. I attached the clothes pins with super-strength super glue. Be careful. My phone was stuck to my hands, literally, for a little bit. As for the clothespin locations, I followed the tutorial, I started at 2 inches and then added a clothespin every 4 inches. 
I attached it to the wall with wall mounting tape also following the tutorials instructions. 


Viola! $.98 and about 12 mini. Cheers to more art projects!

Dipes and Wipes Pouch

Hey Loves!
 

Got a super quick craft for ya! So, you know when I told you about out our toddler bag situation? Well, it occurred to me that sometimes we won’t even need that, just maybe the diapers or wipes. So, I made a cute clutch they can go in and be easily removed if necessary.


This seriously took maybe 20 minutes and very easy to do. I followed this tutorial to the T using some cute alphabet fabric that was given to me. That’s it. It was super easy and came out super cute!

Bathroom Update!

Hey loves!
 

As many of you know, I’m expecting our second baby due in December. So, along with re-doing the nursery, I decided to give the hall bathroom, where all the kids toiletries and bath items are, an update. This will still be the bathroom for guest, so I didn’t want it to be kid-central but just something they could enjoy.


I started by making personalized towel hooks. These are way easier than they sound. I bought two large wooden letters for the first letter of their name, maybe 8-10 inches, and then I bought a pack of small wooden letters to spell out their name. I also purchased a pack of coat hooks. All these items were from Walmart and totaled less than $8. I then painted the larger letters the base neutral color (chocolate brown) and painted the letters alternating accent colors (white and lime). These were already the colors of the bathroom. I had no intention of updating the entire space, just adding accents. Then I super glued the small painted letters on top of the larger initial letter. Sorry for the lack of photos. Nap time crafts don’t lend themselves to properly documenting.


I got the Hubs involved and he found and marked of the studs for me. I attached them to the wall with a nail and wall hanging hooks 


Then, for some extra flare, I found these super cute printables. I still have to find fun frames for them. I want to do them justice! I’ll share more pictures when it is complete!


DIY Halloween Costumes Tips

Hey loves!
 

It’s that time of year! Pumpkins, parties and treats GALORE! For those of you who maybe wanted to make your own costumes, that’s great! You can save money, customize them to your family and improve your crafting skills. However, there is a steep rabbit hole that’s very easy to fall in. I want to help you avoid that.


First, research. You know me, I always start with a recon mission. For example, I knew I would be very pregnant and probably huge so I looked up pregnancy costume ideas. You research what appeals to you and what will fit your family. Maybe your kids are into a certain show or movie and you could start there?


Then, I found it! Eureka! I’m not in love but it works, ya know. Well then, I ran it by the primary stakeholder-the hubs. This is serious. I don’t like irritated character portrayal on Halloween. Everyone must be all-in or a really good sport.


Lastly, and this is very crucial, the feasibility of it all. Are we going to wear these again? How much time will have? Do I really want to be that detailed? How much will this cost? What props will I need? Will I use those again? Seriously people, if you are gonna make a costume, make it worth not buying one. Got it? Ok. Great.


For the drama factor, I can’t share the costumes we chose but, it is limited sewing (again I’ll be very pregnant and huge, works well with my big belly, James will be super cute and my husband is excited about it. That’s a WIN-WIN-WIN in my book.


You can win too. Just don’t go down the rabbit hole.


Happy crafting and Happy Halloween!

Valentine’s Day Attire

Hey Loves!

So, my mom went ham and bought me a ton of vinyl for Christmas and it was a burning a proverbial hole in my proverbial pocket and I just had to make something. And then this happened… 

 
I have no idea how I got all this done but I made:

1. For James- the shirt for his basketball-themed first birthday party (Deets later because y’all know I’m already in mourning.) with a green shirt he already had (hand-me-down, maybe?) and orange vinyl. It spells out ‘One’ but the ‘O’ is a basketball. He also got a YOOO (in conjunction with, not in opposition to YOLO) shirt on a solid grey shirt from Hobby Lobby and red and black vinyl. Finally, I made him a Valentine’s Day outfit with a solid white shirt and grey pants (Old Navy, $1.87 for both after coupon) with red and black vinyl. This is the cutest Valentine’s Day outfit!
2. For me- A heart-themed shirt, red vinyl on a solid black long-sleeve shirt (less than $2 from Old Navy). This has my monogram in the heart with hearts as elbow-patches. I also made a shirt that reads “Mommin’ ain’t Easy” on a blue and white Baseball tee($7.99 from Sports Authority but free after coupon). Lastly I added monograms to my phone case and my planner. 
I’m in love. And vigilantly searching for more things to make…

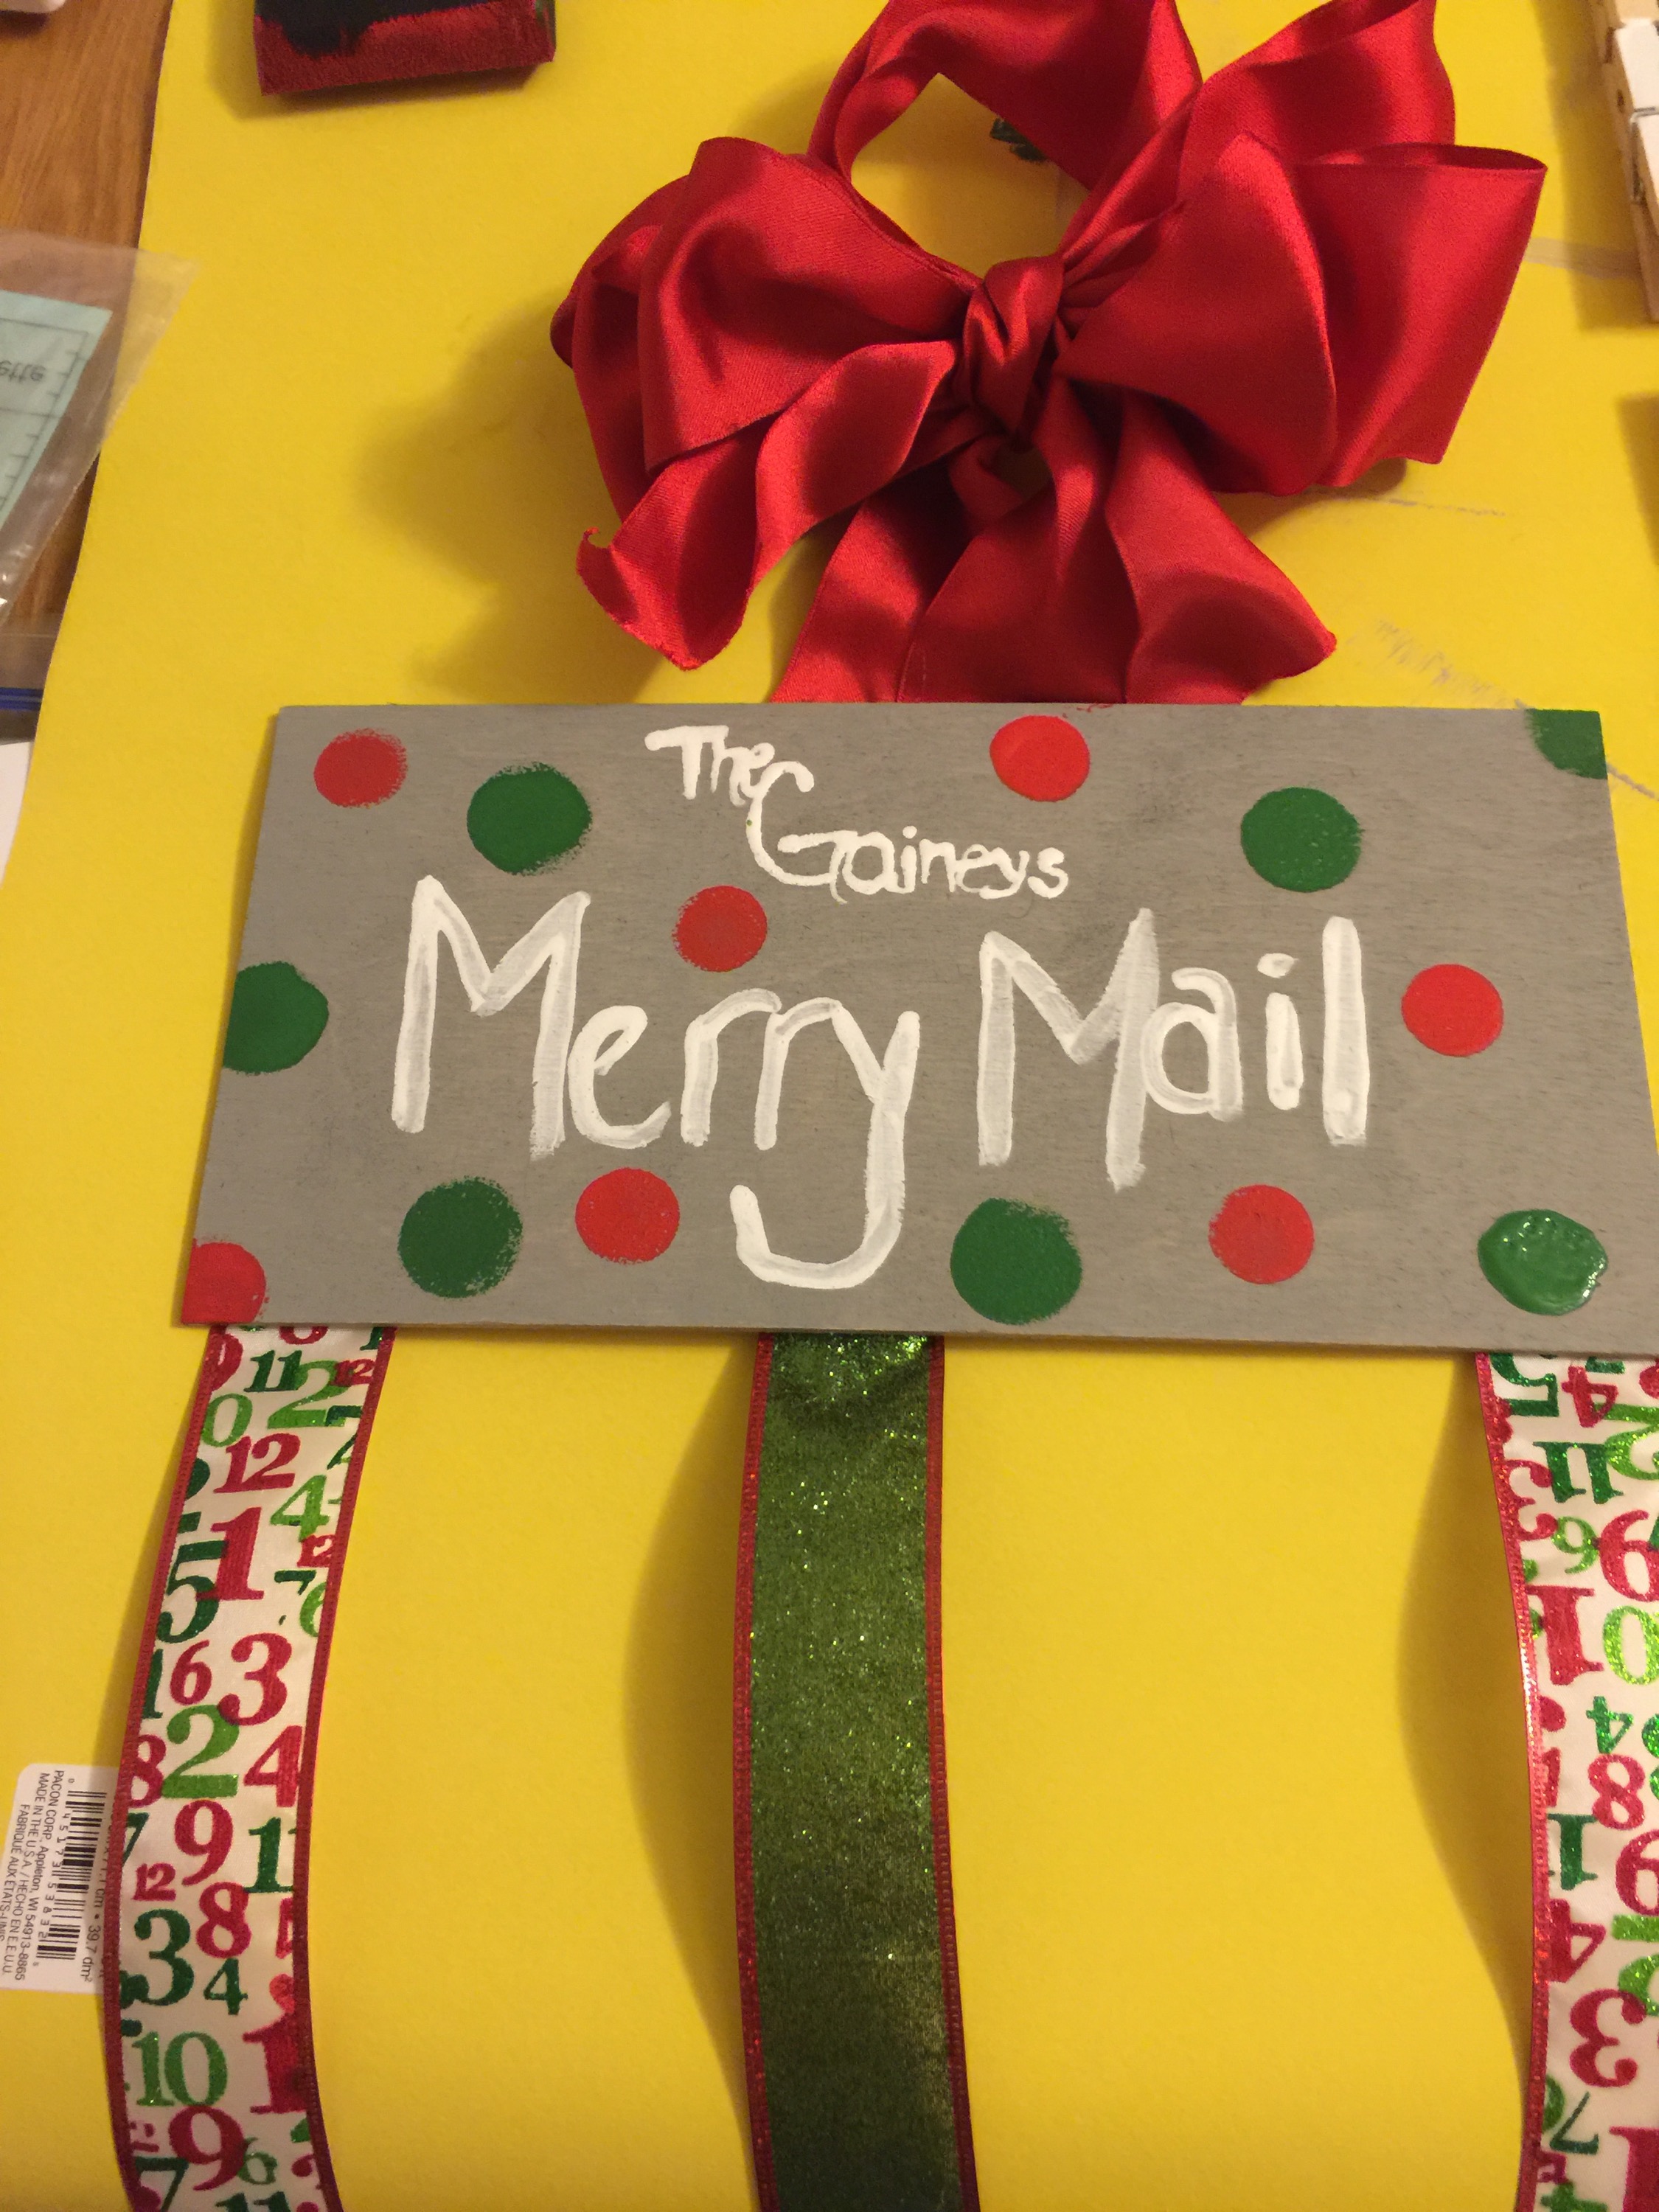
Merry Mail Cardholder Quick Craft

   
 So, the weekend before Thanksgiving, my family and friends went to a local craft and food festival where we saw a Merry Mail Cardholder for $10. Not bad, but I figured I could make it myself. Well, I did. First, I bought a thin wood rectangle from Joanns. It was around $1 after a coupon was applied. 

Then, I painted it with grey acrylic paint, hand-lettered the words (I know my hand-lettering needs LOTS of work! I’m working on it!) and added some red and green polka dots. You can also use vinyl for the words and polka dots. I just wanted to paint. 
Then, I plugged in the hot glue gun and went to my ribbon stash. I found some wired Christmas ribbon from 3 years ago and decided it needed to be used. I also found a bow from a gift last year made with satin ribbon and used that as the handle. (If you, don’t have the bow, you can use ribbon, burlap or just wire to hang it up.) I used hot glue to attach the ribbon and bow. 
Then, because I was going the most, I painted some plain wooden clothes pins I got from Wal-Mart for $.97 red, white and green and attached then to the ribbon after they dried. 
I let sit overnight and then hung inside. Sorry about the lack of pictures. 

Quick Crafting Tutorial- Nursery Edition

Hey Loves!

I sure hope you’re not sick of nursery post. I have a super quick tutorial for you- I mean FAST!

Ready? Set. Go!

1. Go to local craft store and purchase wooden letter of choice and themed scrapbook paper (unless you already have this). I got the larger flatter letter that was not painted.

/home/wpcom/public_html/wp-content/blogs.dir/86e/45878800/files/2014/12/img_3128.jpg

2. Align scrap book paper and either Modge Podge or hot glue it to the letter.

/home/wpcom/public_html/wp-content/blogs.dir/86e/45878800/files/2014/12/img_3129-1.jpg

3. Cut off the edges using an exacto knife or scissors with skilled hands.

/home/wpcom/public_html/wp-content/blogs.dir/86e/45878800/files/2014/12/img_3130-0.jpg

That’s it. I told ya it was quick…and inexpensive too. The letter was $3.49+30% off and the scrap book paper was $.44/sheet.

Until next time!

It’s a DIY Day!!!

Hey Loves!

So, I’m not sure if it is nesting, me being a little crunchy or a combo of both but I’ve been researching and making, and researching and making!

The first thing I tried my hand at was diaper rash cream that was cloth diaper safe. Wait-let me back up- there are a lot of ingredients out there that are in baby products that I wouldn’t put on my skin, let alone my baby’s. There are products out there that more natural and safe but they can cost a pretty penny. So, I make what I can.

Back to the diaper rash cream. I liked this recipe because the ingredients could also be used to simply moisturize skin as well. I followed this tutorial to a T- except I didn’t have a double boiler I just melted it on low heat. I think this is why it took longer to set in the glass jar. I used lemongrass essential oil instead of lavender.

Since we are cloth diapering, I found this web page and got the skinny on some easy cloth wipes and wipe solution I can use so I tried my hands at those too.

While I was at it, I made some shower gel for me using this recipe. The soap was a little harder than I thought the break down and I probably could’ve had the water a little warmer to help with that. After the temps dropped, the soap hardened in the bottle making it pretty unusable. Maybe it will work in the summer?

Lastly, I made some toy and surface cleaner for ‘safe’ cleaning of my little guys items. In a spray bottle, I filled 1/3 of the bottle with vinegar and the rest with warm water. I added a few drops of Tee Tree Oil. So far, so good!

I have a little beeswax left so I think some tinted lip balm is next on my radar.

Note: I got the essential oils and beeswax from a local health food store. All the other ingredients I already had. I purchased the flannel for the cloth wipes from a fabric store for $1.59-1.74/yard.