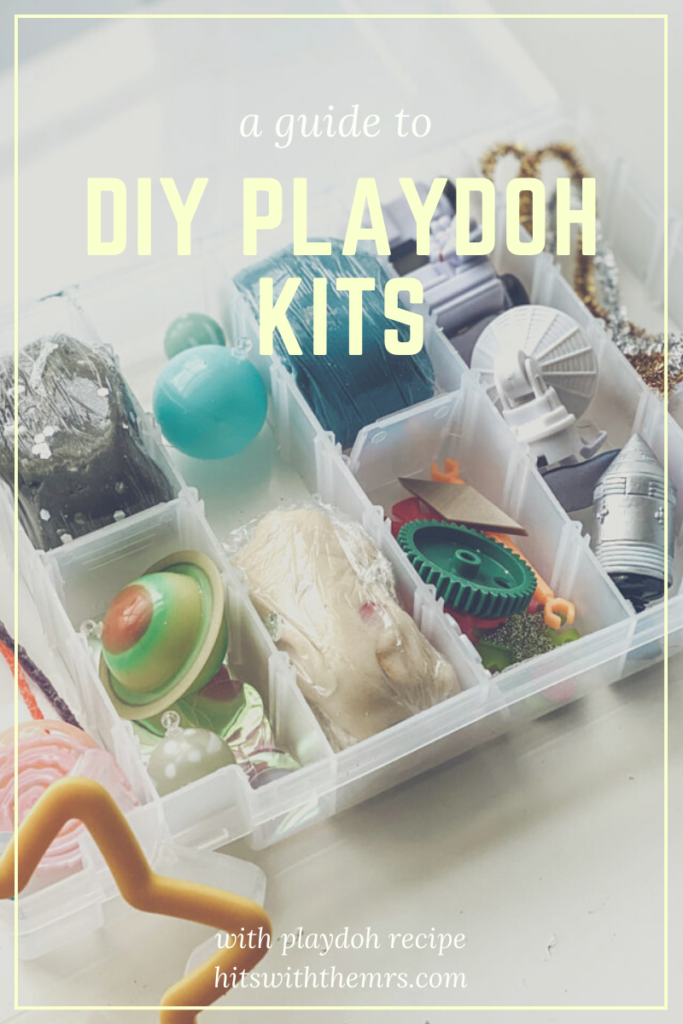
DIY Playdoh Kits

Hey Loves!

Here’s the thing- I completely despise counting myself out. What I loathe more than that is other moms counting themselves out. You wouldn’t believe the amount of “I wish I could do that” or “I wish I was that talented” or “I could never do that” I hear and it is maddening.

I get it though. Seeing something put together in a square with good lighting and a photo preset can make anything look out of my depth. What I wish I knew a while ago is that perfection is not the standard, joy is. Joy from the giver and from the receiver.

I thought I couldn’t make playdoh. It never, ever worked out. I tried, Failed, Tried. Failed disastrously. Thus, I could never make playdoh kits. So I got them as a gift for Jude’s third birthday. When I saw the basic items that cost maybe $3 to display prettily and organized while charging $30 a kit, I was in awe of their genius and then I went to work.

For starters, I found a recipe that worked. I read many blog posts and IG posts to see what was a common denominator and how to do this inexpensively. (for the recipe I use, keep reading.)

I also realized that I have just about everything I need for playdoh kits at home or they can be purchased very inexpensively, I am talking $1.00 or less. On top of that, they can be reused for other kits, crafts or activities.

Now for the execution… 

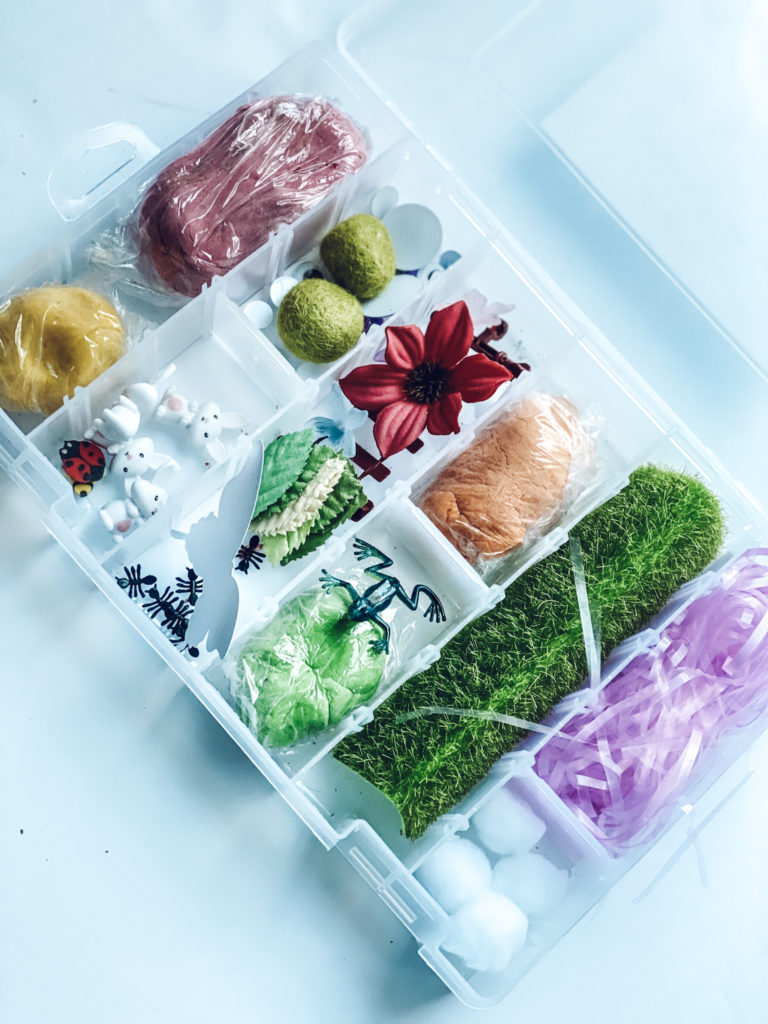
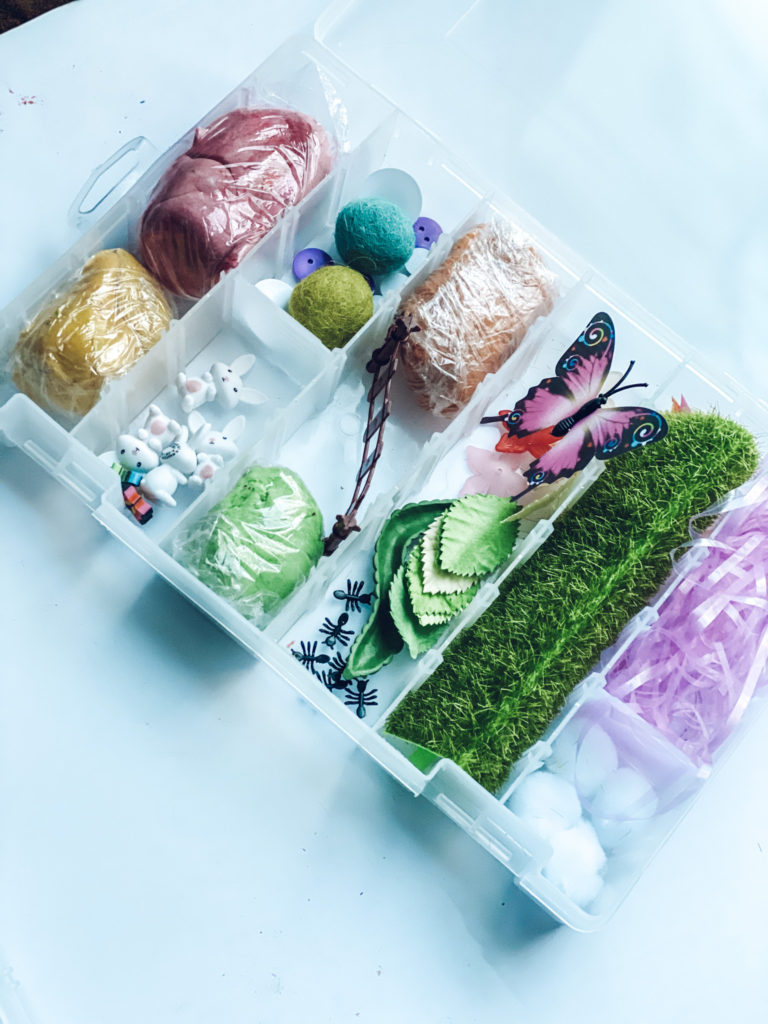
Theme: This is, to me at least, the easiest way to plan out what will be in your kit. While these playdoh kits do allow for open-ended play, a general theme is very helpful. Themes can be anything from seasonal, holiday, curriculum support or fun interests. The good news is, you can make these over and over again so you aren’t limited to one masterful theme. I’ve got tons of ideas saved on Pinterest.

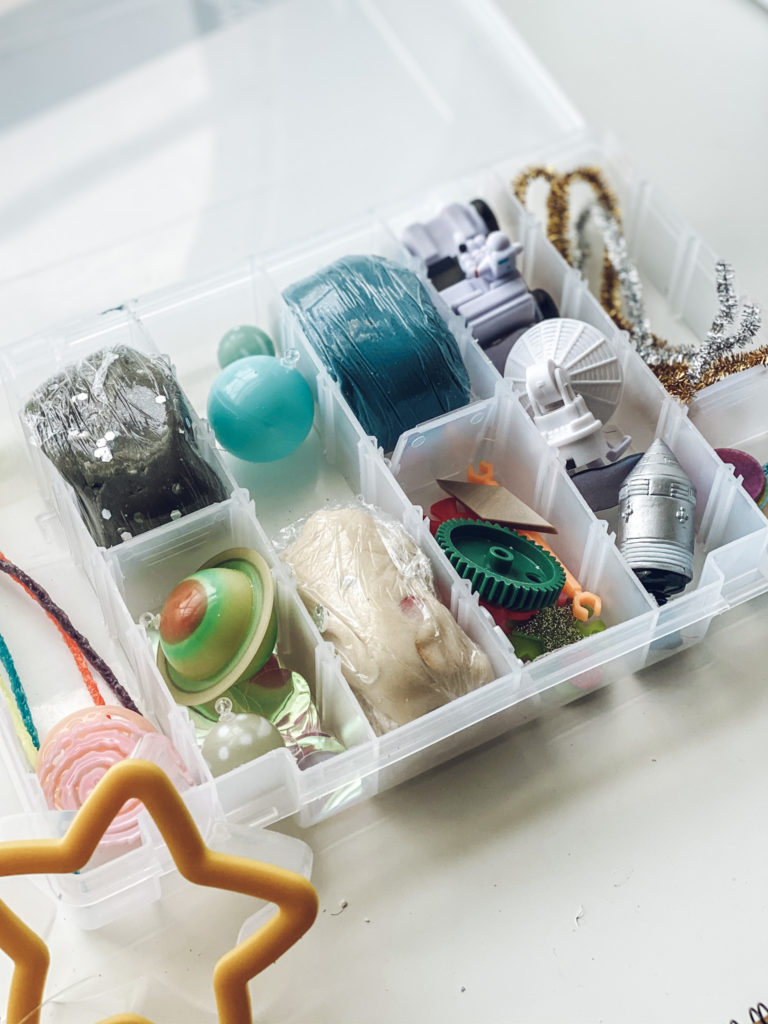
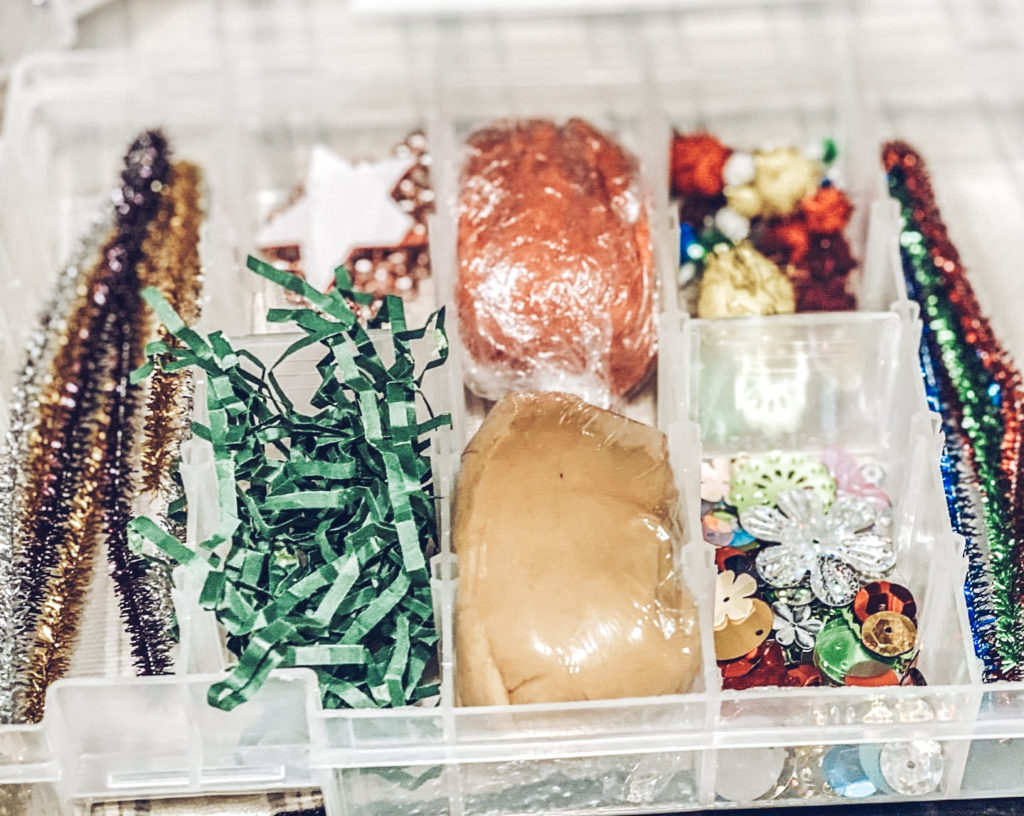
Add-ons: So after you decided on your theme, select your add-ons. I am not sure if that is the technical term for the additional items that arent play-doh in the kit, but that is how they shall be referred to in this blog post. Ok, I say this gingerly but there is very little that is off limits. Toothpicks, straws, pipe cleaners, cookie cutters, small figurines, mini erasers and the list keep going and going. The good news is these items are very inexpensive and can be used for multiple things and, if stored properly, used again. Talk about bang for your buck!

The next thing I suggest purchasing is food coloring, gel and liquid. Don’t ask me but this raises the appeal of playdoh by like five thousand. 

Now to the recipe. I am an enneagram 6w5 and I assure this recipe has been vetted, tested, tried, doubled and made with kids. Thus, I trust it implicity. I found this recipe via IG from @simplylearning and bless her entire soul.

½ cup of flour (I use stick the cheapest, most non organic here. My kids are past ingesting playdoh so this is not a concern for me.)

8 tsp of salt (see above, cheap!)

1 tsp of Cream of Tartar (This can not be omitted. Don’t substitute.)

½ cup of water

1.5 tsp of vegetable oil

You are going to mix these in a stainless pan that you have the stove on low-medium heat.(I keep the pan slightly “pre-heated”. I combine with a wooden spoon until you get a “dough consistency”

Scoop it out on a floured surface and knead. Yup. You don’t want the playdoh to stick to you. Add flour in very small increments until you’ve reached that consistency.

Then you add your food coloring. This magic is up to you. I typically use a combo of gel and liquid to achieve the desired colors.

Optional: I add essential oils. These provide calming and positively stimulating responses from my kids on top of smelling heavenly.

That’s it! Happy playdoh kit making friends! Be sure to tag me in your creations.

Love you! Mean it.

Sensory Coping Caddy

Hey Loves!

In my last post, we talked about Sensory-Friendly Homeschool supplies. Today, I want to quickly share how I organized them. If you’re new here, you should know that organization, clean lines and neutral tones make my heart sing. I simply adore them. With that, I have two kids who just, most of the time, don’t show that they feel that way. So, part of my organization now is training them to know things have a place and to put them back. Who knew that was a part of parenting?

I digress. Anywho… let’s get to my happy place- the organization.

To start, and I suggest this with anything you are organizing, you have to access the size and the amount of the items, then the functionality of what you are looking for. For example, when I organized our pantry in April, I needed large bins with handles that were visually appealing. They also had to fit on the shelves, etc.

I gathered all the supplies I knew I wanted them to be able to use and grab at their leisure or with my prompt and separated them from a massager and  the weighted items (weighted vest, lap pad and belt). Once I had an idea of how many items would go in each kid’s caddy, then I chose the caddy. I went with these shower caddy’s from Target. They were inexpensive, sectioned and were deep enough to hold the items safely but allow for easy access for little hands. It also didn’t hurt I could get it via drive-up and not have to ship it.

Armed with my caddies, I decided what I would put in each compartment instead of just putting the items in the caddy. I promise there is a method to this madness. For me, doing it this way helps me visually take inventory and know where to tell my boys where to get them and put them back as I am training them to use these. It also helps know when to replace or restock items. For example, I can quickly check and see if I need to grab another chewlery (necklaces or clips that can be used for oral input and regulation) as the one I had in there is being washed.

Now to the fun part, sorting and placing, Yay!!!! I sectioned the 3 compartments into: Chewlery/Oral input, Fidgets and Coping/Calm Down. Sill with me?

After I knew where I wanted these items to go, then I placed them in their respective compartments.

I finished them off by adding a chalk label with their name. Viola!

If that was a bit hard to understand, I have a time-lapse video in this IG highlight and a YouTube video notating all the sensory things we have and where I got them.

Per usual, don’t hesitate to ask me any questions. I am here for you. Until next time,

Love you. Mean it.

Sensory-Friendly Homeschool Supplies

Hey Loves!

Time is flying! I’m wrapping up my planning and prep for our new homeschool year and wanted to share how the tools we have for my sweet babes to help them cope with sensory integration while learning, playing and living their best life. 

Flexible Seating: Bilibo Spin Seats, Scoop Rockers, Floor Cushions, Sensory Seats, Exercise Ball, and Wobble Stools… yes, I know that sounds like a lot and yes, we have them all. However, these were accumulated over the years and purchased as gifts, from consignment sales and even yard sales. Do you need it all? No! We plan on homeschooling as long as God allows it so we felt these were investments into our home. They use them way more than when we are learning. It was also important for me to give my kids the best possible environment for them to learn, not for me to teach. I also didn’t want to emulate traditional school and force them to sit in one spot and still. Depending on seating you have available, I’ve heard great things about “kick bands” 

Movement Jar: Sensory kids needs to move! Depending on they’re hypo and hyper sensitivity levels, the will needs some sort of proprioceptive and/or vestibular input. I’ve been at this for a few years now and it is still hard for me to remember all the different movements. So, I found a free printable with movement activities and stuffed them in a jar. This way, this gives the child ownership and lets them identify their needs, advocate for their needs and meets their needs. It also gives my brain and heart a break. 

Fine Motor Tools: To make this easier, I compiled a list here. Lots of kids have an un-diagnosed fine motor delay. Their little hands need help and that’s ok. This year, I’m venturing to make some pencil weights and I’ve learned through experience having a small variety of writing tools and letting the writer choose is what works for us. I also had help from my occupational therapist. To see these tools in action, check out the video here

Coping, Calming, Fidgets & Weighed Items: I’m a big advocate for teaching kids to advocate for themselves. Having these tools around helps in two ways: It helps me see a need and have a tool to meet it. It also helps me train them to advocate for themselves. If I see seeking, I can ask, “do you need _______” and allow them to answer and get the item. I did have to teach them how to use these properly and work through some discomfort because some things they need they don’t love. Our main items in these categories are weighted vests and lap pads; stress balls, something to massage, and something to occupy their hands.

I want to reiterate Rome wasn’t built in a day. It may not be super easy to identify their needs. You’ll misread a behavior. You may not have chewelry handy. There may be a transitional meltdown. I’ve spent years crying over my mistakes and if there’s anything I’ve learned, it’s that I am but mere mortal. My humanity is what makes me error but it also the reason I have for error. Grace. Extend it and receive it, always. I didn’t get all these items in a day. I didn’t even know the purpose of some of them the first I saw or read about them. I started with one or two and maximized use for those and then added as needed. 

Homebound Egg Hunt Ideas

Hey Loves!

Spring has sprung, a pandemic is raging and Easter 2020 will look a bit different for us all. I’m sure you were looking forward to cute outfits, fun times with friends and/or family and continued or new traditions. I get it. I lament with you. We must adjust and adjust we will, together.

With “Stay In Orders” and #SocialDistancing in full effect, group egg hunts are not going down on a church lawn near you, instead, you can make them happen right in your yard or your home. Here are a few different ways how!

I’ve done an egg hunt at my house every year sine James could walk. My sons have lots of sensory needs and have issues with crowds so it was initially to “practice” and then it became a tradition. Below are some we have done and some I certainly want to try.

Traditional Egg Hunt

Listen, times are hard. Emotions are raging and your house, well if it is anything like mines, is being cleaned one minute and destroyed the next. Buy eggs, fill with candy, hide all over your house. If the sugar rush is too much, let them run, six feet from other people of course. 

Scavenger Egg Hunt

We are going to try a Scavenger Egg Hunt this year for the kids to find their Easter Baskets (a video on Easter Basket ideas for you here). I found this free printable, (we also used her verse cards as a Lent Count down) and I knew it was perfect. We traditionally go to church on Saturdays but I wanted Easter morning to be filled with Resurrection Joy. Now, it still can be!

Glow-In-The-Dark Egg Hunt

This was one of my all-time favorites. Again, my kids have lots of sensory needs, so very low lighting soothes both of them. You will need to buy mini- glow sticks to fit in traditional size plastic eggs. We did this indoor as my boys are younger and already had to stay up a little later so it could be dark (Thank you, time change.) but this would be great outside in a contained space as well. If you’re concerned about a “one-time-use” of the glow sticks, don’t be. We then used them for sensory baths, pattern practice and did the glow in the dark egg hunt about 3 times.

Magnetic Egg Hunt

James loves science. He really should be the STEAM poster child. He was gifted this magnetic fishing set about 2 years ago and used them to “experiment” (his word, not mine), with everything in my house to see if it could be “magnetized”. He experimented with items that included but aren’t limited to: Everything in my lower kitchen cabinets, combs, brushes, hangers and bras. So, I decided to put to those blasted fishing poles to good use. I had these magnets on hand from making their chore charts (inspiration from that is linked here ) and put them in plastic eggs. Because I didn’t participate in James’ above research, I had to learn the hard way you must not put these close together because they attract like love bugs. I also put non-magnetic things in eggs for a little more science fun. This hunt did take a little longer because they had to “attract” the fishing pole to the egg and James had to use the fishing pole to put in it in his Easter Basket, not his hands, insert eye roll emoji right here, friends. No magnetic fishing poles around your place? No problem! Get two of those magnets linked above and glue them to a popsicle stick, Let em dry and BOOM!

Themed Egg Hunt 

Dinosaurs, princess, legos, Oh My! Fill the eggs with a theme of choice, and hide. (Note* you can put things they already have in the eggs.) The great thing about this is you can truly tailor it to your child(ren)’s interest and likes. One year, a friend and I split a package of 50 dinosaur eggs. They “hatched” baby dinosaurs that we still play with today. The sky is really the limit here. If you have multiple themes, separate them by giving each theme a specific color egg because your sanity matters!

Coupon Egg Hunt

I will be adding these to our Easter Baskets. COVID-19 really threw us a “fun activity out of the house” curveball. Things I actually planned and promised my kids we would do, we can’t. While they are understanding, it still hurts them a bit so I will be adding coupons for fun activities they can cash in as soon as this pandemic goes bye-bye. Some will be free, some will be things we were going to do anyway, some will be low-costs and one will be a big family fun day. The coupons also include some fun activities we can do in our house that are VERY rare (special dessert, late bedtime, etc.). You can also tie this in with the scavenger egg-hunt if you like.

Non-Candy Egg Hunt

This is my jam. If we just met, here’s the deal: I am very picky about what goes in and on our bodies and sadly, the candy joy of my childhood, my kids have not experienced. I have found some ahhhhhmazing candy choices that my kids get on birthdays and I may add to Easter baskets, but 24 eggs of candy is a hard pass. This is where you can also get creative. Erasers, stickers, bouncy balls, pretend jewelry mini figurines, you name it! Put those dollar spot finds in eggs, hide and let joy ensue. You can also make this a theme and put each kid’s items in a specific color egg, something I may try this year.

Did I miss anything? Tell me! I want in!

Also, happy Easter. (If you want more Easter Fun ideas, follow me on IG where I share all the deets.)

Love you. Mean it.