Cleaning and Crafting=HIT!
Hey Loves!
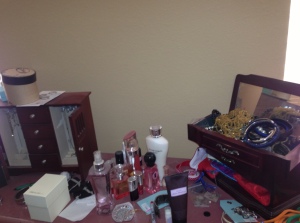
I have been a busy bee lately and now I am getting even busier. As Spring has sprung, I am in the mindset of Spring cleaning. I composed my “To-Clean List” (will be posted later) as well as the items we need to buy to complete said cleaning. In preparation, I started cleaning out some serious danger areas of our bedroom. I started with my dresser (pictured below) that was full of JUNK! My jewelry was everywhere and not accessible. I had perfume literally collecting dust because I never wear it as they contain artificial scents and are not holistic. So I decided to clean, throw out and craft.
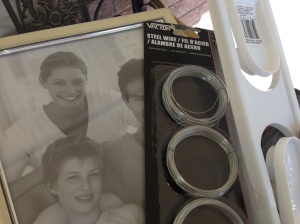
I started by going to Pintrest and search ‘jewelry organizers’ and saw this and this. They looked easy and inexpensive. I went to my local Dollar store and purchased:

- 2 paper towel holders
- Wire (it came in a 3 pack)
- 1 picture frame
Then I got to work. I must admit, I didn’t read any of the instructions on the tutorial. I just saw them and said ‘I can do that’ and then did it. You are more than welcome to refer to the tutorials above. I must also apologize. I got so caught up in crafting, I didn’t take step-by-step photos. *gives self two slaps on the wrist* I will do better. I promise. In the meantime here is what I did and what I used for each item. Enjoy!
*Note* For all three items I used left over fabric from other projects so it was already cut and I am unsure of the exact specifications for each. However, I am sure I did not use more than 1 yard for all three projects.
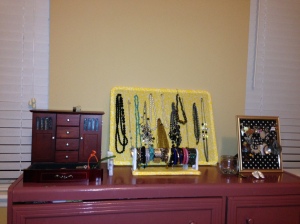
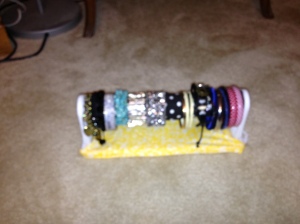
Here are photos of the before and after. The tutorials are below. Thanks! Comment and share!


Earring Display
Items needed
- Fabric (amount depends on how big your picture frame is)
- Picture frame (size depends on how much space you have and how many earrings)
- Wire (you can also use mesh wire, they didn’t have that at the dollar store)
- Hot glue gun and sticks
Process
- Remove backing and glass from frame.
- (make sure glue gun is ready to go) measure fabric for frame backing and cover by streaming glue on the frame backing and placing fabric on top of hot glue. Press down to make sure the fabric is securely attached.
- Measure wire the width of the frame and cut the amount strips you need. I used three. Secure to the frame by dotting with a small drop of hot glue and holding until secure. Do this for all the strips. Make sure it is secure on both sides of the frame. (This was the trickiest part for me. It may take a little patience as well as trial and error.)
- Insert backing covered with fabric and secure.
- Organize earrings and hang! You can always add more wire strips as your collection grows. As for placement, I put the longest/biggest earring at the bottom, medium in the middle in small at the top.
Necklace Display
Items Needs:
- Cork Board
- Fabric
- Glue Gun/Sticks
- Push pins or straight pins
Process
- Similar to the earring display, measure the amount of fabric you need to cover the front of the cork board.
- Using the hot glue gun, attach the fabric to all sides of the cork board; make sure it is secure.
- Align the straight pins any way that is most accommodating to size of your cork board and the amount of necklaces you intend to display (I didn’t have push pins. #fail They are much easier to use and you can get them in cute coordinating colors. I doubled strait pins and used them to hang the necklaces. If you have really heavy necklaces, the straight pins will not hold. Straight pins are temporary.)
- Organize and hang the necklaces!
Bracelet/Watch Display
Items Needed
- Paper towel (A horizontal one, not a vertical one)
- Paper towel roll
- Fabric
- Hot glue gun and fabric
Process
(If you can’t tell, there a is a lot of similarity in these projects)
- Measure fabric to cover paper towel roll (you can use multiple pieces as the bracelets and or watches will cover the lines) and cover using hot glue gun
- Organize and slide on bracelets and watches
- Adjust covered paper towel roll to fit in holder!
*Note* I covered the bottom of my paper towel holder with fabric, the same way I covered all the other stuff, but I wouldn’t recommend it unless you have a high grade sturdy cotton fabric.
*Update* I know accessorize more because I can see everything and I don’t have to dig through that pile of junk to find what I need! yay!


Alecia
AWESOME!!! This will be a great project for me and my nieces. I love it. Thanks do much for sharing. BTW, if you have any great ideas for storing nail polish and accessories, let me know. My niece and I do nails all the time. Love you T. Keep doing what you are doing!!!
themrs
Thanks so much! I am working on that now!